A hub for DIY woodworking, featuring easy-to-follow tutorials for creating small furniture and decor.

Saturday, January 25, 2025

Elegant Console Table Designs with Glass or Marble Tops

Elegant Console Table Designs with Glass or Marble Tops

So, you're looking for a console table? Fantastic! They're such versatile pieces, aren't they? Perfect for entryways, hallways, behind sofas… really, anywhere you need a little extra surface space and a touch of elegance. And when you add a glass or marble top? Oh, my goodness, the possibilities are endless. Let's dive into some stunning designs and explore why these materials are so popular.

The Allure of Glass Tops

There's something undeniably chic about a console table with a glass top. It's all about the light and airy feel. The transparency creates a sense of spaciousness, making even a small hallway seem larger. But it's not just about making a room feel bigger; it's about showcasing the beauty of the base. Think of it as a spotlight for the craftsmanship below. Whether it's intricate metalwork, sleek wood, or a striking combination of materials, the glass allows the base to truly shine.

Modern Minimalism with Glass

For a contemporary look, consider a console table with a clear glass top and a minimalist metal base. Think sleek chrome or brushed stainless steel legs, perhaps in a geometric design. This style is perfect for modern apartments or homes with a clean, uncluttered aesthetic. The transparency of the glass keeps the space feeling open and unburdened, allowing the focus to remain on the clean lines of the base.

Classic Elegance with Glass

You can also achieve a classic and elegant look with glass. Imagine a console table with a clear glass top resting on a beautifully carved wooden base. Perhaps a dark, rich mahogany or a light, airy oak. This style provides a beautiful contrast between the modern clarity of the glass and the traditional warmth of the wood, creating a timeless piece that effortlessly blends with various decor styles. Consider adding decorative elements to the wooden base for extra flair, like intricately carved details or elegant brass inlays.

Playing with Texture and Color with Glass

Don't limit yourself to clear glass! Frosted glass, smoked glass, or even colored glass can add a unique personality to your console table. A frosted glass top can create a more diffused, softer light, while smoked glass adds a touch of mystery and sophistication. Colored glass, such as a deep emerald green or a vibrant sapphire blue, can become a statement piece in your home.

The Majestic Beauty of Marble Tops

Marble. Just the word itself evokes images of luxury and sophistication. A console table with a marble top instantly elevates the space, bringing a touch of timeless elegance and high-end style. The natural veining and subtle color variations in marble make each piece unique and incredibly beautiful. It's a material that ages gracefully, adding character and charm over time.

Classic Marble Console Tables

For a truly classic look, pair a marble top with a sturdy wooden base. The contrast between the cool, smooth marble and the warm, textured wood creates a beautiful visual harmony. Choose a simple, elegant base to let the marble be the star of the show, or opt for a more ornate base for a bolder statement.

Modern Marble Designs

Marble isn't just for traditional styles. It works beautifully in modern settings, too. A sleek, minimalist metal base paired with a marble top creates a striking contrast that is both sophisticated and contemporary. Think clean lines, geometric shapes, and a palette of neutral colors.

Choosing the Right Marble

There are many types of marble available, each with its unique characteristics. Carrara marble is known for its clean white background with subtle gray veining, while Calacatta marble boasts bolder, more dramatic veining. Nero Marquina marble is a striking black marble with intricate white veining. Consider your existing décor and personal style when choosing the perfect marble for your console table.

Beyond the Top: The Importance of the Base

While the glass or marble top is undeniably the showstopper, the base is equally important. It’s the foundation that determines the overall style and functionality of the console table. A sturdy, well-designed base provides support and stability, while also adding to the aesthetic appeal. Consider these factors when choosing a base:

  • Material: Wood, metal, stone â€" each offers a different look and feel.
  • Style: Modern, traditional, rustic, minimalist â€" the style of the base should complement your home's décor.
  • Height: Ensure the height of the console table is appropriate for its intended location.
  • Storage: Consider if you need drawers or shelves for extra storage.

Maintenance Tips for Glass and Marble Tops

While both glass and marble are beautiful, they do require a little extra care. Glass tops are relatively easy to clean, but avoid harsh chemicals that could scratch or damage the surface. For marble, regular cleaning with a soft cloth and a mild cleaner is essential. Avoid acidic substances, as they can etch the marble. A marble sealant can help protect the surface from stains and spills.

Commonly Asked Questions

Q: Are glass console tables fragile?

A: While glass can break, many modern console tables use tempered glass, which is much stronger and more resistant to breakage than standard glass. The sturdiness of the base also plays a crucial role in the overall stability of the table.

Q: How do I clean a marble console table?

A: Use a soft cloth and a mild cleaner, avoiding acidic substances. Regularly seal your marble to protect it from stains and spills.

Q: Are console tables with glass or marble tops expensive?

A: Prices vary greatly depending on the size, materials, and craftsmanship. You can find affordable options, but high-end pieces with premium materials can be quite costly.

Q: Where can I buy a console table with a glass or marble top?

A: You can find these tables at furniture stores, both online and brick-and-mortar, as well as through interior design showrooms and specialty retailers.

Hopefully, this has given you a better understanding of the many beautiful and versatile designs available when it comes to console tables with glass or marble tops! Happy decorating!

Share:

Step-by-Step DIY Guide to Building and Painting Wooden Wall Signs for Beginners

Craft Your Dream: A Beginner's Guide to Building & Painting Wooden Wall Signs

Ready to unleash your inner artist and add a personalized touch to your home décor? Building and painting wooden wall signs is a surprisingly accessible craft, perfect for beginners. This step-by-step guide will walk you through the process, from selecting your materials to proudly displaying your finished masterpiece. Get ready to transform plain wood into a charming statement piece!

Gathering Your Supplies: A Checklist for Success

Before you dive into the creative process, gather your essential supplies. This ensures a smooth and efficient workflow. Don't worry, you likely already have some items on this list! Head to your local craft store or hardware store to pick up the rest. Investing in quality materials will make a noticeable difference in your final product.

Essential Materials:

  • Wood: Choose a piece of wood appropriate for your sign's size and design. Untreated pine or plywood works well for beginners. Consider the thickness â€" thicker wood offers a more substantial feel.
  • Sandpaper: You'll need various grits (e.g., 80, 120, 220) for smoothing the wood. Start with coarser grits and finish with finer ones for a perfectly smooth surface.
  • Primer: A high-quality primer ensures your paint adheres properly and prevents bleed-through. Choose a primer suitable for wood.
  • Paint: Select your favorite paint colors! Acrylic paints are a great choice for their versatility and easy cleanup.
  • Paintbrushes: Get different brush sizes for various details. A high-quality brush will leave a smoother finish.
  • Stencil (Optional): Use stencils to create crisp lettering or designs if you lack confident freehand painting skills.
  • Pencil: For sketching your design directly onto the wood or transferring a stencil.
  • Measuring Tape & Ruler: Accurately measure and mark your wood for cutting and design placement.
  • Saw (Optional): If you need to cut your wood to size, a hand saw or jigsaw will do the trick.
  • Wood Glue (Optional): If you're creating a layered design, wood glue will secure the pieces.
  • Clamps (Optional): Hold layers together securely while the wood glue dries.
  • Protective Gear: Always wear safety glasses and a dust mask when sanding and sawing.

Preparing Your Wood: The Foundation of a Great Sign

Proper wood preparation is crucial for a professional-looking finish. Take your time with this step â€" it will significantly impact the final result. A smoothly sanded surface allows for even paint application and prevents imperfections from showing through.

Sanding to Perfection:

Begin by sanding your wood with the coarser grit sandpaper (80 grit), working in the direction of the wood grain. Gradually switch to finer grits (120 and then 220) to achieve a smooth, even surface. Pay close attention to any rough edges or imperfections.

Cleaning Up:

Once sanded, wipe down your wood thoroughly with a damp cloth to remove all dust particles. This prevents dust from interfering with the primer and paint adhesion.

Painting Your Masterpiece: Adding Color and Character

Now comes the fun part â€" painting your sign! Follow these steps to create a beautiful and durable finish. Remember to work in a well-ventilated area.

Priming for Success:

Apply a thin, even coat of primer to your prepared wood. Allow it to dry completely according to the manufacturer's instructions. Priming is essential for ensuring the paint adheres correctly and preventing the wood grain from showing through.

Painting Your Design:

Once the primer is dry, apply your chosen paint color(s). For a solid color, apply two thin coats, allowing each coat to dry completely before applying the next. If using a stencil, carefully apply the stencil to the wood and use a small brush to paint within the stencil's lines. For a more rustic look, consider using a dry brush technique, applying paint with a barely loaded brush for a distressed effect.

Adding Finishing Touches:

Once your paint is completely dry, you can add any additional details like embellishments, lettering, or a sealant to protect your artwork.

Displaying Your Creation: Sharing Your Handmade Art

Congratulations! You've successfully built and painted your wooden wall sign. Now, find the perfect spot to display your handcrafted artwork. Consider the style of your room and where the sign will best complement your existing décor. You can hang it using picture hooks, nails, or even adhesive strips depending on the weight of your sign and the type of wall.

Enjoy the satisfaction of creating something beautiful and unique with your own hands. Share your creation with friends and family â€" and get ready to start your next project!

Share:

Wednesday, November 20, 2024

How to Make and Sell Wooden Chess Tables with Built-In Chairs for a Complete Set

How to Make and Sell Wooden Chess Tables with Built-In Chairs for a Complete Set

Crafting and Selling Wooden Chess Tables with Built-In Chairs: A Complete Guide

Are you passionate about woodworking and love the classic game of chess? Combining these interests could lead to a fulfilling and potentially profitable business venture. Building and selling wooden chess tables with built-in chairs offers a unique blend of craftsmanship and entrepreneurial spirit. This guide provides a step-by-step approach to turning your woodworking skills into a thriving business.

1. Planning and Design

Before diving into the workshop, it's essential to have a clear vision for your chess tables. Consider these factors:

1.1 Target Audience

Who are your ideal customers? Are you aiming for casual players, serious competitors, or families looking for a unique game table? Understanding your target market will shape design choices, pricing, and marketing strategies.

1.2 Size and Dimensions

Decide on the optimal dimensions for your chess table. Standard chessboard sizes are 18" x 18" or 20" x 20". Factor in the chair dimensions to ensure comfortable seating and ample legroom for players.

1.3 Style and Aesthetics

Choose a style that aligns with your target market. Traditional designs with intricate carvings appeal to some, while modern minimalist styles might resonate with others. Consider using high-quality wood species like cherry, walnut, or mahogany for a premium look and feel.

1.4 Features and Functionality

Think about additional features that enhance the playing experience:

  • Cup holders for drinks.
  • Storage compartments for chess pieces and accessories.
  • Built-in lighting for evening games.
  • Optional fold-away design for space-saving.
  • 2. Materials and Tools

    Gather the necessary materials and tools for constructing your chess tables:

    2.1 Wood

    Select high-quality wood species known for their durability and aesthetic appeal. Examples include:

  • Cherry
  • Walnut
  • Mahogany
  • Maple
  • Oak
  • 2.2 Hardware

    You'll need various hardware components, including:

  • Screws and bolts for assembly
  • Hinges for folding tables
  • Casters for easy mobility
  • Wood glue for strong joints
  • 2.3 Tools

    A well-equipped workshop is essential. Gather the following tools:

  • Saw (circular, table, or band saw)
  • Router
  • Drill press
  • Sanding tools (sandpaper, belt sander, orbital sander)
  • Clamps
  • Measuring tools (ruler, tape measure, square)
  • Finishing tools (brushes, spray gun, rags)
  • 3. Construction Process

    Follow these steps to build your wooden chess tables:

    3.1 Table Base

    Start by constructing the table base. Cut and assemble the legs, rails, and aprons. Ensure the base is sturdy and level.

    3.2 Chessboard Platform

    Create a platform to hold the chessboard. This can be a simple wooden panel or a more elaborate frame. Make sure the platform fits securely on the base.

    3.3 Chairs

    Construct the chairs. Build the seat, backrest, legs, and armrests. Consider using comfortable and durable materials for the seat and back.

    3.4 Assembly

    Carefully assemble the table base, chessboard platform, and chairs. Make sure all connections are secure and the table is level.

    3.5 Finishing Touches

    Sand the entire table and chairs to a smooth finish. Apply a wood stain or paint, depending on your desired look. Apply a protective sealant to protect the wood from scratches and spills.

    4. Marketing and Sales

    Once your chess tables are complete, you need to get them in front of potential buyers:

    4.1 Online Presence

    Create a website or online shop to showcase your chess tables. Use high-quality photos and detailed descriptions to highlight their features and craftsmanship. Consider selling on popular e-commerce platforms like Etsy or Amazon.

    4.2 Social Media Marketing

    Leverage social media platforms like Instagram and Facebook to share photos and videos of your chess tables. Engage with potential customers, run contests, and build a following for your brand.

    4.3 Local Events

    Participate in local craft fairs, art shows, and community events. This allows you to connect with potential customers directly and showcase your tables in person.

    4.4 Partnerships

    Collaborate with local businesses like chess clubs, coffee shops, or furniture stores to promote your chess tables and reach new audiences.

    5. Pricing and Profitability

    Determine a fair price for your chess tables considering factors such as:

    5.1 Materials Cost

    Calculate the cost of wood, hardware, and finishing materials. Factor in any additional costs associated with production, such as power and tools.

    5.2 Labor Cost

    Estimate the time you spend crafting each table. Assign a reasonable hourly rate for your labor.

    5.3 Market Competition

    Research prices for similar chess tables online and in local stores. Adjust your pricing to be competitive while reflecting the value of your craftsmanship.

    5.4 Profit Margin

    Ensure your pricing allows for a reasonable profit margin after covering all costs. This will ensure sustainability and the potential for future growth.

    Commonly Asked Questions

    Here are some frequently asked questions about crafting and selling wooden chess tables:

    Q: How much time does it take to build a chess table?

    The construction time varies depending on the complexity of the design, your skill level, and the tools you use. A simple table might take 20-30 hours, while a more intricate design could take 50-70 hours or more.

    Q: What are the potential profits from selling chess tables?

    The profit potential depends on your pricing strategy, sales volume, and operational costs. A well-crafted chess table can be sold for $500 to $2,000 or more, depending on the materials, design, and features. With good marketing and a reasonable production volume, you can earn a decent profit.

    Q: Where can I find inspiration for chess table designs?

    Online resources like Pinterest and Google Images offer a wealth of inspiration. You can also look at furniture catalogs, antiques shops, and visit woodworking forums for ideas.

    Q: How do I protect my chess table designs?

    While you can't copyright a general design concept, you can trademark specific names, logos, or unique features for your tables. Additionally, you can apply for a design patent if your chess table has a novel and non-obvious design.

    Starting a woodworking business involves hard work and dedication, but with a passion for chess and woodworking skills, you can create beautiful and functional chess tables that bring joy to players and investors alike. Remember to approach your business with meticulous planning, attention to detail, and a desire to exceed customer expectations.

    Share:

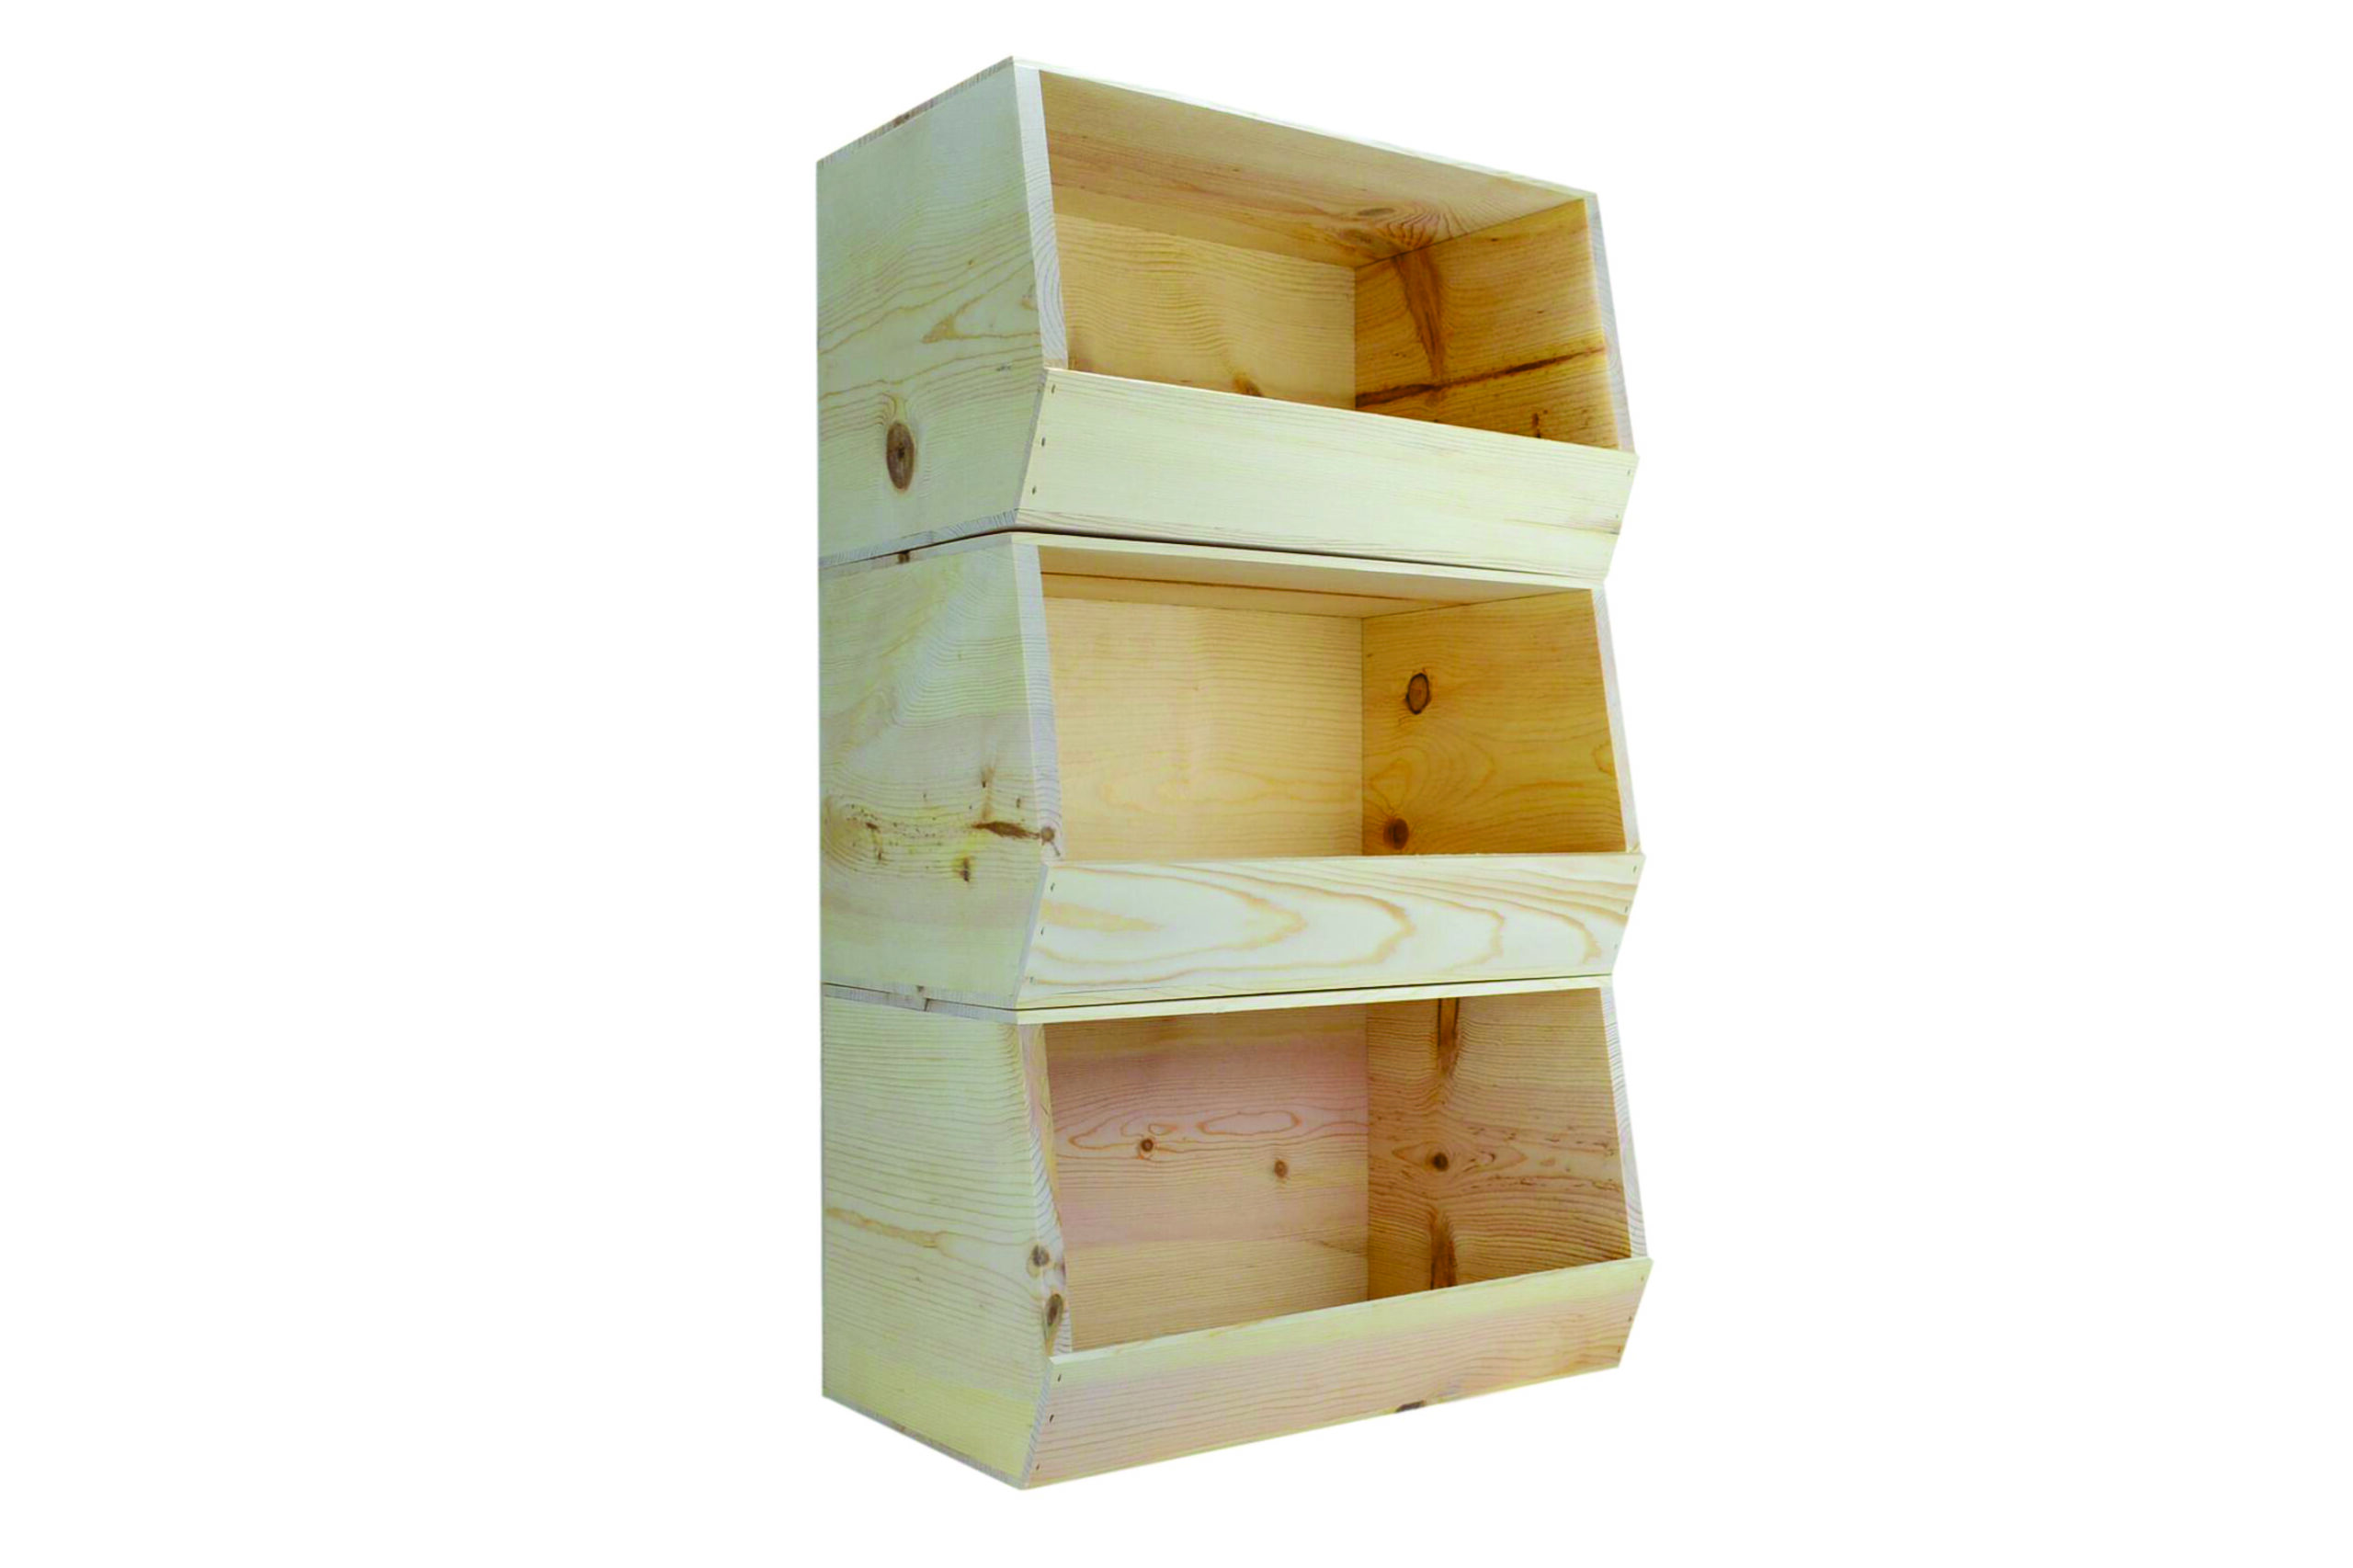
    Wooden Storage Bins with Personalization Options for Sale

    Wooden Storage Bins with Personalization Options for Sale

    Wooden Storage Bins with Personalization Options

    In the realm of home organization and decorative accents, wooden storage bins have emerged as a timeless and versatile solution. These charming containers not only provide a practical means of storing belongings but also add a touch of rustic elegance to any space. With the advent of personalization options, wooden storage bins have transcended their functional role and become cherished keepsakes that reflect individual style and taste.

    The Allure of Wooden Storage Bins

    The appeal of wooden storage bins lies in their inherent warmth, durability, and aesthetic appeal. Crafted from natural materials, these bins exude a sense of timelessness and sophistication. Their solid construction ensures longevity, while their versatility makes them suitable for a wide range of storage needs.

    Benefits of Wooden Storage Bins

    • Durability: Wood is a naturally strong and resilient material, making these bins ideal for storing heavy items.
    • Versatility: Wooden storage bins can be used for a variety of purposes, from storing toys and clothes to organizing craft supplies and books.
    • Aesthetic Appeal: Their rustic charm and natural beauty add a touch of warmth and character to any room.
    • Environmental Friendliness: Wood is a renewable resource, making these bins an eco-conscious choice.

    Personalization Options: Elevating Wooden Storage Bins to Keepsakes

    The ability to personalize wooden storage bins transforms them from simple storage solutions into cherished keepsakes. These unique touches add a personal element, making them ideal gifts for special occasions or as a way to celebrate individual achievements.

    Popular Personalization Techniques

    • Engraving: Laser engraving allows for precise and intricate designs to be etched onto the wood. Names, initials, dates, and special messages can be permanently inscribed, creating a lasting impression.
    • Painting: Hand-painted designs or custom artwork can be applied to the bins, adding a vibrant splash of color and personalization. This technique allows for creative freedom and unique expressions.
    • Decoupage: Applying decorative paper or fabric to the surface of the bin adds a unique texture and visual interest. This technique is ideal for incorporating favorite images, patterns, or quotes.
    • Monogramming: Adding initials or a monogram adds a touch of elegance and personalization to the bins. This option is especially popular for gifts and for use in a more formal setting.
    • Custom Labels: Creating personalized labels for the bins allows for easy organization and a decorative touch. These labels can be printed on paper, fabric, or even wood.

    Applications for Personalized Wooden Storage Bins

    The versatility of personalized wooden storage bins extends beyond their practical function. These containers can be incorporated into various aspects of life, adding a touch of charm and personalization to every occasion.

    Home Décor and Organization

    • Nursery: Personalized bins with a child's name or initials can store toys, blankets, and other essentials, adding a touch of whimsy to the space.
    • Playroom: Bins labeled with different categories like "blocks," "puzzles," or "art supplies" help organize toys and keep the room tidy.
    • Bedroom: Bins with monograms or decorative designs can be used to store clothes, accessories, and other personal items.
    • Bathroom: Bins with engraved labels can store towels, toiletries, and other bathroom essentials.
    • Living Room: Bins can be used to store remote controls, magazines, and other living room necessities.

    Gifts and Special Occasions

    • Birthdays: Personalized bins with a child's name or a special message can be a thoughtful and practical gift.
    • Weddings: Bins with the couple's names or wedding date can be used to store wedding photos, gifts, or other mementos.
    • Anniversaries: Bins engraved with a special message or a significant date can be a cherished keepsake for a couple's anniversary.
    • Graduation: Bins personalized with a graduate's name or a message of congratulations can be a meaningful and practical gift.
    • Housewarming: Personalized bins with a new homeowner's initials or a welcome message can be a warm and thoughtful gift.

    Business and Branding

    • Promotional Items: Personalized wooden storage bins with a company logo or slogan can be used as promotional giveaways or as part of a corporate gifting program.
    • Retail Displays: Bins can be used to display products or merchandise, adding a touch of rustic charm and elegance to retail environments.
    • Office Organization: Bins can be used to store files, supplies, and other office essentials, adding a personalized touch to the workspace.

    Conclusion

    Wooden storage bins with personalization options offer a perfect blend of practicality and aesthetic appeal. Their ability to enhance organizational efficiency while adding a touch of personal style makes them a valuable addition to any home, business, or special occasion. Whether used for home décor, as thoughtful gifts, or for branding purposes, these versatile containers provide a unique and lasting way to express individuality and create cherished keepsakes.

    Share:

    Tuesday, November 19, 2024

    Creative DIY Picture Frames for Home and Gifts

    Creative DIY Picture Frames for Home and Gifts

    Creative DIY Picture Frames for Home and Gifts

    Okay, let's be real - picture frames can get boring, right? Those basic, store-bought ones just don't have that special something. But what if I told you you could make picture frames that are not only unique and stylish, but also a breeze to create? That's where DIY picture frames come in, and let me tell you, the possibilities are endless!

    Not only will crafting your own picture frames save you some cash (because let's be honest, fancy frames can be pricey!), but it's a chance to unleash your inner artist and create something truly special. Whether you're sprucing up your home, giving a thoughtful handmade gift, or just looking for a fun project, DIY picture frames are the way to go.

    Getting Started: Gather Your Supplies

    Before diving headfirst into the world of DIY frames, it's good to have your materials ready. You'll need a few basics to get started. No need to go crazy, just pick a few that catch your eye:

    • The Foundation: You'll need a sturdy base for your picture. This could be a pre-made picture frame, or you can get crafty with materials like cardboard, wood, or even metal.
    • The Picture: Of course, you need the star of the show â€" your favorite photo! Choose a size that will fit nicely in your frame.
    • Adhesive: This is essential for attaching the picture to the frame. Think glue, double-sided tape, or even a little bit of fabric.
    • Decorative Materials: This is where you get to have fun! Pick materials that match your style, like fabric scraps, yarn, buttons, beads, ribbon, paper, paint, or anything else that sparks your creativity!
    • Tools: You'll need a few basic tools like scissors, a ruler, a pencil, and a hot glue gun (if you're working with more delicate materials).

    Easy & Stunning DIY Picture Frame Ideas

    Now, let's get into the fun part! Here are some easy and incredibly stylish DIY picture frame ideas that will make you want to grab your crafting supplies right away:

    1. Fabric-Covered Frames

    This is a classic for a reason! Simply cover a basic frame with your favorite fabric. You can choose patterns, textures, or even upcycle old clothes! Just use fabric glue or a staple gun to secure the fabric to the frame. This is a great way to add a touch of personality and color to your walls.

    2. Rope-Wrapped Frames

    For a rustic and charming look, wrap your frame with rope. It's a simple yet stunning idea! You can use natural twine or rope for a natural vibe, or go for a more colorful rope to match your decor. Just wrap the rope around the frame, securing it with a hot glue gun as you go. This technique is perfect for adding a little texture and warmth to your home.

    3. Painted Frames

    Sometimes, a simple paint job can totally transform a picture frame. Choose a color that complements your photo and decor. You can paint it solid, create stripes, or even try a geometric pattern. The options are endless!

    4. Decoupage Frames

    Decoupage is a fun and easy technique that involves gluing paper, fabric, or other materials onto a surface. For your picture frame, you can use paper napkins, magazines, or even printed photos. Simply coat the frame with decoupage glue, then carefully apply your chosen materials. Let it dry, and you'll have a unique and personalized frame.

    5. Upcycled Frames

    Get creative and repurpose old items into frames! Use an old windowpane, a vintage record, or even a piece of driftwood. Just secure your photo with adhesive and let your imagination run wild!

    DIY Picture Frame Tips & Tricks

    Okay, so you're ready to create your own masterpieces, but hold on! Here are a few handy tips to make your DIY picture frame journey smooth sailing:

    • Measure Twice, Cut Once: Before you start cutting any materials, make sure you've measured everything correctly. This will save you from any unwanted surprises!
    • Practice Makes Perfect: If you're new to DIY, start with a simple project. You can always get more ambitious later on. There are plenty of tutorials and resources available online to guide you through the process.
    • Add Your Personal Touch: The best DIY projects are the ones that reflect your style. Don't be afraid to experiment with different colors, textures, and materials. Remember, it's your creation, so make it unique!
    • Use Quality Materials: You'll get the best results if you use high-quality materials. This doesn't mean you have to spend a fortune. Just try to choose durable items that will last.
    • Have Fun!: DIY projects should be enjoyable, so don't get too stressed if things don't go perfectly. Relax, experiment, and have fun creating something beautiful!

    DIY Picture Frames as Gifts

    Alright, let's talk gifts! DIY picture frames make absolutely amazing, heartfelt presents. They show you put extra effort into the gift, and they're a fantastic way to showcase a special photo. Here are some gift ideas:

    • Personalized Frames: Add a special touch by incorporating the recipient's initials, favorite color, or a quote they love.
    • Matching Frames: Create a set of coordinating frames for a family portrait, a group of friends, or a collection of treasured memories.
    • Frames with a Theme: Choose a theme that reflects the recipient's hobbies or interests, like travel, music, or nature.

    With a little creativity and effort, you can create DIY picture frames that are both stunning and meaningful. So go ahead, unleash your inner artist and start crafting!

    Commonly Asked Questions

    1. What types of glue are best for DIY picture frames?

    For fabric, hot glue or fabric glue is your best bet. For wood or metal, you can use wood glue or even a strong epoxy adhesive.

    2. How do I hang my DIY picture frame?

    It depends on the material! Most frames can be hung with a picture hanger, which you can attach to the back of the frame. But if you're using a unique material, like a vintage record, you might need to get creative and use wire or string for hanging.

    3. Where can I find more DIY picture frame ideas?

    There are tons of resources available online! Check out websites like Pinterest, YouTube, and Etsy for inspiration and tutorials.

    Share:

    Monday, November 18, 2024

    Garden Birdhouses That Are Always in Demand

    Garden Birdhouses That Are Always in Demand

    Garden Birdhouses That Are Always in Demand

    Want to attract some feathered friends to your garden? Birdhouses are a great way to provide shelter and nesting space for birds, and they can also be a beautiful addition to your landscaping. But with so many different types of birdhouses available, it can be tough to know which ones are the most popular.

    That’s where this guide comes in! We'll explore the most sought-after birdhouses that people are constantly looking for, and why they're so popular. We'll delve into the reasons these styles are in high demand, and uncover the secrets to attracting your favorite birds to your garden.

    Birdhouses That Attract Specific Bird Species

    A lot of people are fascinated by certain birds and want to attract them to their yards. So, naturally, birdhouses designed for specific species are a big hit. Let's dive into a few examples.

    Bluebird Houses

    Bluebirds are known for their bright blue feathers and cheerful songs, making them a favorite among bird enthusiasts. They prefer open, grassy areas and will gladly nest in a well-constructed bluebird house. When building or purchasing a bluebird house, ensure:

    • The entrance hole is 1 1/2 inches in diameter.
    • The house is mounted 5-6 feet above the ground.
    • It's positioned in a sunny location with clear views of the surroundings.

    A well-placed bluebird house will attract these beautiful birds, adding a touch of vibrant color to your garden.

    Woodpecker Houses

    Woodpeckers are another popular bird species for birdhouse enthusiasts. These quirky birds are known for their drumming sounds and unique nesting habits. If you're looking to attract woodpeckers, you'll need a birdhouse that meets their specific needs.

    A woodpecker house should:

    • Have a larger entrance hole (1 1/2 to 2 inches in diameter).
    • Be made of sturdy wood (preferably untreated, as woodpeckers will peck at it).
    • Be mounted on a tree trunk, at least 10 feet off the ground.

    Woodpecker houses offer a unique charm and create an interesting addition to your garden, while also providing these fascinating birds with a safe and comfortable nesting site.

    Hummingbird Houses

    Hummingbirds, with their tiny size and incredible flight abilities, are a joy to watch. These energetic birds are attracted to nectar feeders and can be encouraged to nest in your garden with the help of a hummingbird house. Hummingbird houses are designed to offer a small, enclosed space for nesting and are usually made of wood or plastic.

    Here are some key features of a hummingbird house:

    • A small entrance hole (about 1 inch in diameter).
    • A sheltered location that is protected from wind and rain.
    • Placement in a sunny area with flowering plants nearby.

    Hummingbird houses are not only functional but also visually appealing, adding a touch of whimsy to any garden.

    Birdhouses That Offer Unique Designs and Functionality

    Besides species-specific designs, there are birdhouses that capture attention through their uniqueness, functionality, and beauty. Here are some examples that are often in high demand.

    Birdhouses with Decorative Elements

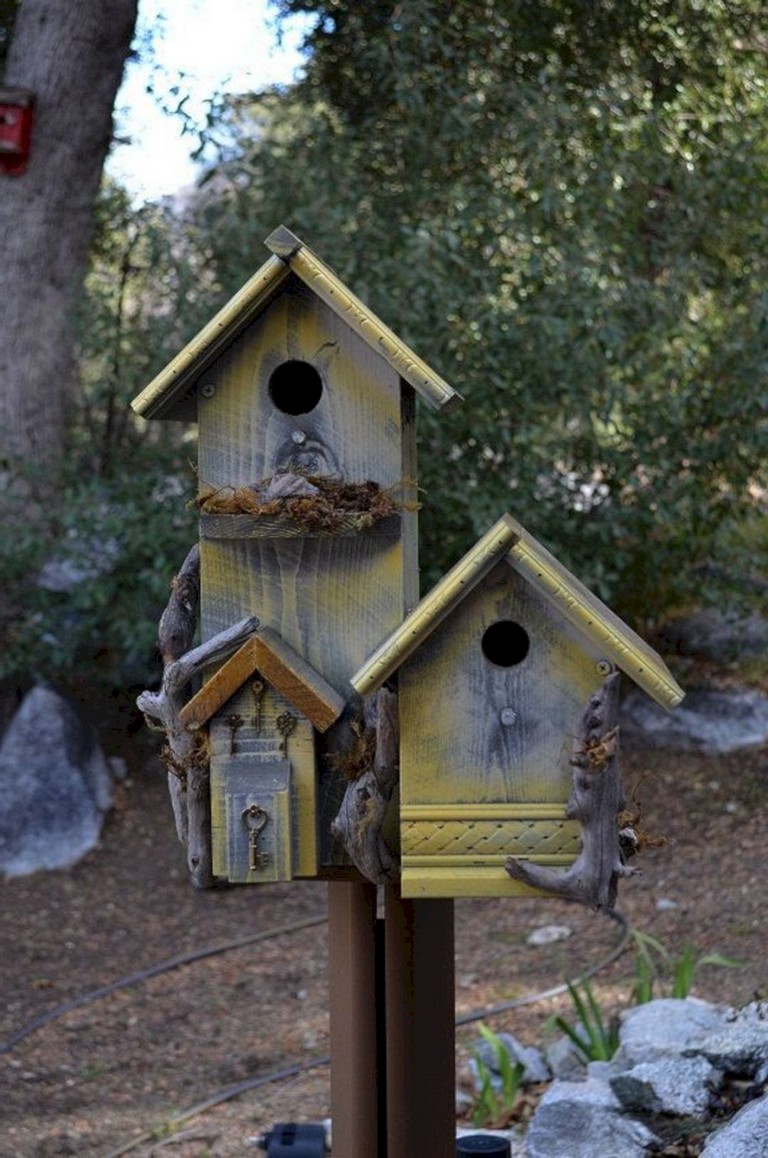
    Birdhouses that are also works of art are a favorite among those looking to add a touch of personality to their garden. These houses often feature intricate carvings, painted designs, or unique materials like recycled metal or repurposed wood.

    Birdhouses with decorative elements:

    • Can be customized to match your garden's style.
    • Offer a unique and personal touch to your landscape.
    • Can be a conversation starter and bring joy to both you and your feathered friends.

    Whether it's a whimsical gnome house or a rustic farmhouse style, a decorative birdhouse adds a unique and delightful element to your garden.

    Birdhouses with Multiple Compartments

    Birdhouses with multiple compartments are ideal for attracting a variety of birds. These houses can have separate nesting cavities for different species, offering more options for your feathered friends.

    Here's why multi-compartment birdhouses are popular:

    • They allow different birds to coexist peacefully.
    • They provide more nesting options, increasing the chances of attracting a diverse range of birds.
    • They can be a visually appealing addition to your garden, with their unique and practical design.

    By offering a variety of nesting spaces, these birdhouses cater to the needs of different species and create a bustling haven for birds in your garden.

    Birdhouses with Observation Features

    Some birdhouses are designed with features that allow you to observe the birds nesting inside. These can include clear windows or removable panels that give you a glimpse into the birds' lives.

    Here's why birdhouses with observation features are a hit:

    • They offer a fascinating window into the birds' nesting behavior.
    • They allow you to observe the birds' growth and development without disturbing them.
    • They can be a fun and educational experience for kids and adults alike.

    Observing birds in their natural habitat can be a truly rewarding experience, and birdhouses with observation features make it possible to enjoy this connection without disturbing the birds.

    Tips for Choosing the Right Birdhouse

    With so many birdhouses to choose from, it's important to consider a few key factors before making your purchase.

    • Bird Species: What types of birds do you want to attract? Different birds prefer different size birdhouses with different entrance hole sizes.
    • Material: Wood is the most common material for birdhouses, but you can also find them made from plastic, metal, or even recycled materials.
    • Location: Consider the location of your birdhouse and choose one that is protected from the elements and predators.
    • Maintenance: Choose a birdhouse that is easy to clean and maintain. Make sure the roof is easy to remove for cleaning and that the entrance hole is large enough to allow for easy access for you.

    Beyond Birdhouses: Other Garden Features for Bird Attraction

    Birdhouses are a great start, but there are other things you can do to make your garden more inviting for birds. These include:

    • Planting Native Plants: Birds love native plants for food and shelter. Plant a variety of flowers, shrubs, and trees that provide natural food sources and nesting sites.
    • Providing a Water Source: Birds need a reliable source of fresh water for drinking and bathing. Set up a birdbath or a small pond in your garden.
    • Offering Supplemental Food: In the winter months, you can supplement the birds' natural food sources by providing seed feeders and suet feeders.
    • Creating a Safe Habitat: Protect your garden from cats and other predators by keeping your pets inside or supervised, using bird-friendly fencing, and avoiding the use of pesticides and herbicides.

    Commonly Asked Questions

    When is the best time to put up a birdhouse?

    The best time to put up a birdhouse is in the late fall or early winter, before the birds start nesting in the spring. This gives the birds time to find and get accustomed to their new home before breeding season begins.

    How often should I clean a birdhouse?

    It's a good idea to clean your birdhouse at least once a year, preferably in the fall after the nesting season ends. This will help to prevent the spread of disease and parasites.

    What if no birds move in?

    Don't worry if no birds move into your birdhouse right away. It may take some time for the birds to find it. Be patient and continue to make your garden a bird-friendly habitat.

    Now you're equipped with the knowledge to choose and install the most sought-after birdhouses. Remember, providing a safe and comfortable nesting site is essential to attract and sustain birds in your garden. By understanding the preferences of different bird species and incorporating unique designs and features, you can create a vibrant and thriving bird sanctuary in your own backyard!

    Share:

    Wednesday, November 13, 2024

    How to Make a Wooden Candle Holder with Multiple Holders for a Stunning Display

    How to Make a Wooden Candle Holder with Multiple Holders for a Stunning Display

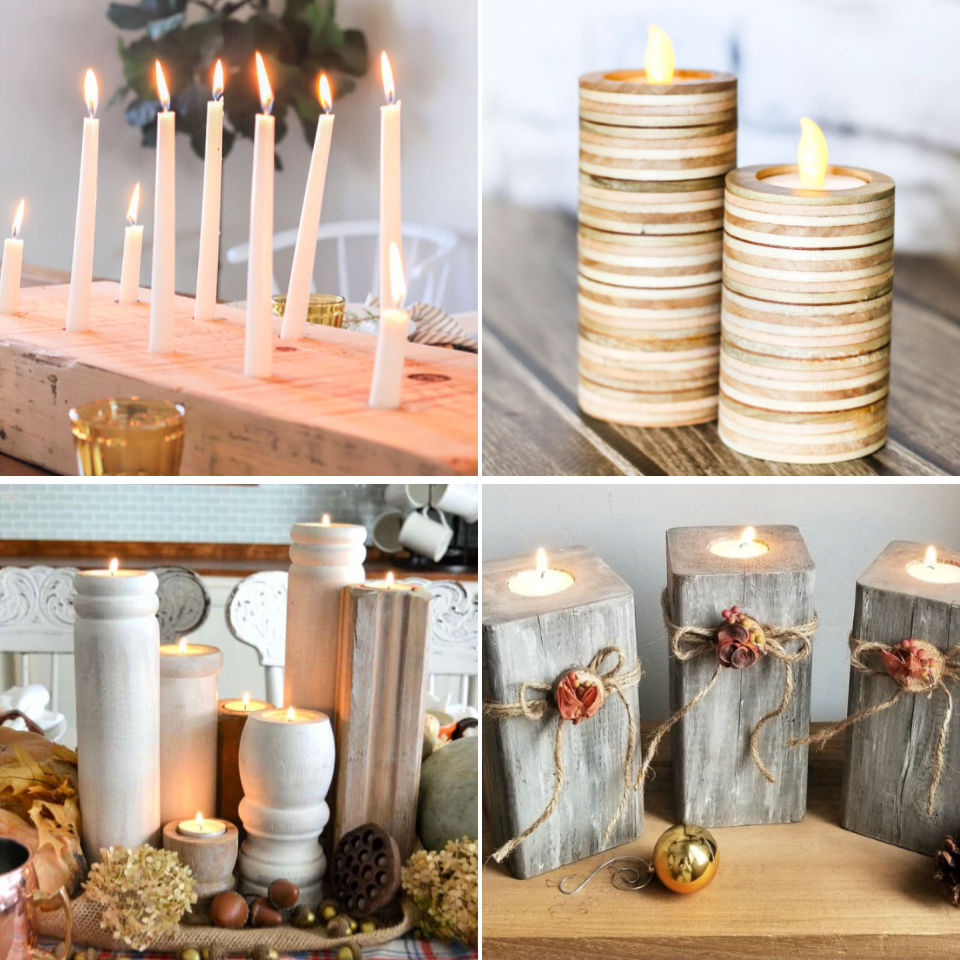
    Craft a Stunning Candle Display with a Multi-Holder Wooden Candle Stand

    Elevate your home décor with a captivating centerpiece â€" a multi-holder wooden candle stand. This DIY project allows you to unleash your creativity and design a unique piece that perfectly complements your style. Whether you prefer a rustic charm or a modern aesthetic, this guide will walk you through the process, step by step, to create a stunning candle display.

    Gathering Your Supplies

    Before you begin, gather the necessary materials. You'll need:

    • Wooden board (thickness depends on the size of your candles and the desired height of the stand)
    • Drill with various drill bits (including a bit slightly larger than your candle diameter)
    • Sandpaper (various grits)
    • Wood glue
    • Wood stain or paint (optional)
    • Clear sealant (optional)
    • Candles (choose your preferred size and style)
    • Measuring tape
    • Pencil
    • Safety glasses
    • Dust mask

    Designing Your Candle Stand

    Visualize the layout of your candle stand. Consider the size of your candles, the desired number of holders, and the overall aesthetic you're aiming for. Sketch a simple design on paper to guide your work.

    Determining the Placement of Candle Holders

    Use your measuring tape and pencil to mark the exact locations for your candle holders on the wooden board. Ensure the spacing between each holder allows for sufficient air circulation and prevents overheating. You can experiment with different patterns â€" a symmetrical arrangement for a classic look or an asymmetrical design for a contemporary vibe.

    Creating the Candle Holders

    With the locations marked, use your drill to create holes for each candle. The holes should be slightly larger than the diameter of your candles to ensure a secure fit. To prevent splintering, use a drill bit that's slightly smaller than the final desired hole size and gradually increase the size until it's just big enough for your candles.

    Assembling and Finishing Your Stand

    Once the candle holders are drilled, sand the wooden board to smooth out any rough edges. Use sandpaper of varying grits, starting with a coarser grit to remove any imperfections and finishing with a finer grit for a smooth finish. You can choose to leave the wood in its natural state or enhance its look by applying a wood stain or paint. Apply a clear sealant to protect the wood and enhance its durability.

    Adding Your Personal Touch

    To personalize your candle stand further, consider adding decorative elements. You can create a rustic feel by adding reclaimed wood pieces, rustic metal accents, or even natural elements like moss or stones. For a contemporary vibe, opt for sleek metal pieces, glass accents, or geometric shapes. Let your imagination run wild and create a unique piece that reflects your style.

    Lighting Your Candle Stand

    With your wooden candle stand complete, it's time to enjoy its beauty. Place your chosen candles in the holders and light them up. The warm glow of the candles will beautifully illuminate the surrounding space and create a cozy and inviting atmosphere. Remember to exercise caution and always place the stand on a stable surface, away from flammable materials.

    Creating a multi-holder wooden candle stand is a rewarding DIY project that allows you to personalize your décor and create a stunning centerpiece. Let your creativity guide you and enjoy the process of crafting a unique and beautiful piece that will enhance the ambiance of your home.

    Share:

    Search This Blog

    Powered by Blogger.

    Pages