


Alright, so you're itching to build your own desk, huh? One that's not just sturdy, but also has some sweet storage space? You're in the right place, buddy! Building your own desk is a rewarding project that lets you flex those woodworking muscles and create a piece of furniture that's uniquely yours.
Let's break down the process step-by-step, making sure you've got all the tools and knowledge you need. Think of this as a woodworking adventure, and I'm your guide.
First things first: The Blueprint
Before we dive into sawing and gluing, we need a plan. This is where you get to be the architect! Decide what kind of desk you want:
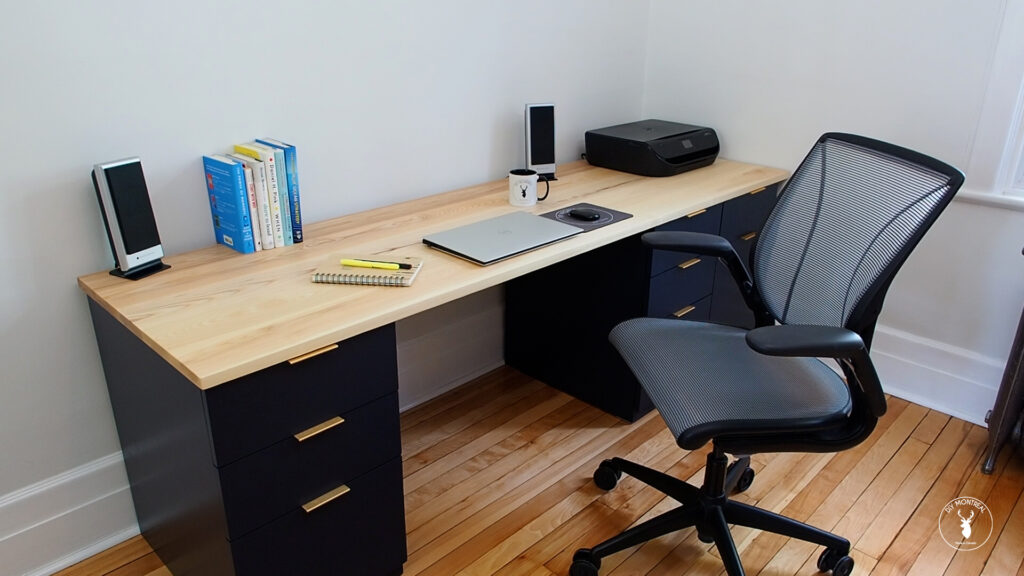
A classic L-shaped desk? Perfect for a home office with plenty of space for a computer and other gadgets.
A simple, rectangular desk? Great for smaller spaces or if you just need a work surface and some storage.
A desk with a built-in hutch? Add some extra shelves and drawers for organization and style.
Once you've got the basic design in your head, it's time to sketch it out. Draw it on paper, use a computer program, or even just visualize it in your mind. This is where you decide on the size, the number of drawers, and any special features you want.
Gather Your Tools and Materials
Now for the fun part! It's time to gather your tools and materials. You'll need:
Wood: Hardwood like oak, maple, or cherry is sturdy and looks amazing. Pine is also a good option if you want a lighter desk.
Power tools: A circular saw, jigsaw, drill, and sander will make your life much easier.
Hand tools: A hammer, screwdriver, measuring tape, level, and a chisel are essential.
Fasteners: Wood screws, wood glue, and possibly some pocket hole screws.
Finishing supplies: Wood stain, wood filler, and a good quality polyurethane for protection.
Getting Started with the Build
1. Cutting the Pieces
Now that you've got your plan and materials, it's time to start cutting!
Double-check your measurements: Measure twice, cut once! You don't want to start over because of a wrong cut.
Use a saw guide: It'll help you make precise cuts and avoid those wobbly edges.
Sand down any rough edges: A smooth surface makes for a nicer finished product.
2. Assembling the Desk Top
Glue and screw: This is how you'll join the pieces together.
Clamps: These help you keep everything tight and even while the glue dries.
Pre-drill holes: This prevents the wood from splitting when you're driving screws.
3. Building the Legs and Base
Choose your leg design: You can use simple square legs, turned legs, or even metal legs for a modern look.
Cut the legs to size: Make sure they're all the same length and width.
Attach the legs to the base: You can use screws, dowels, or even mortise and tenon joints.
4. Adding Storage
Drawers: You can create drawers from scratch or buy ready-made ones.
Shelves: They can be fixed or adjustable to fit different storage needs.
Cabinets: For larger storage, you can build in a cabinet with doors.
5. Finishing Touches
Sanding: Smooth out any rough spots and create a consistent finish.
Filling any holes: Use wood filler to fill any gaps or screw holes.
Staining: This adds color and depth to your desk.
Applying a finish: Polyurethane protects your desk from scratches and spills.
Adding Some Personal Style
Now for the fun part - you can make your desk uniquely yours with these tips:
Use different wood species: Create a contrasting pattern with different wood for the desktop, legs, or drawers.
Carve details: Add intricate designs or a simple border on the edge of your desk.
Paint or stain: Express your creativity with paint, stain, or both!
Safety First
Wear safety glasses: Protect your eyes from wood chips and sawdust.
Use a dust mask: Keep those lungs healthy!
Always use the proper tools for the job: This ensures you're using the tools safely and effectively.
Final Touches
Once your desk is built, it's time for the grand finale!
Clean up: Give it a good wipe down to remove any dust or debris.
Enjoy! Sit back and admire your creation. You've created a piece of furniture that's unique, functional, and built with your own hands.
Remember: This is just a starting point. Get creative, experiment, and have fun with the process! You'll be amazed at what you can create with a little time, effort, and your own woodworking skills.
Now, go out there and build a desk that's as awesome as you are! And if you have any questions along the way, don't hesitate to ask. We're all here to help you create something truly special!

0 comments:
Post a Comment
Note: Only a member of this blog may post a comment.